
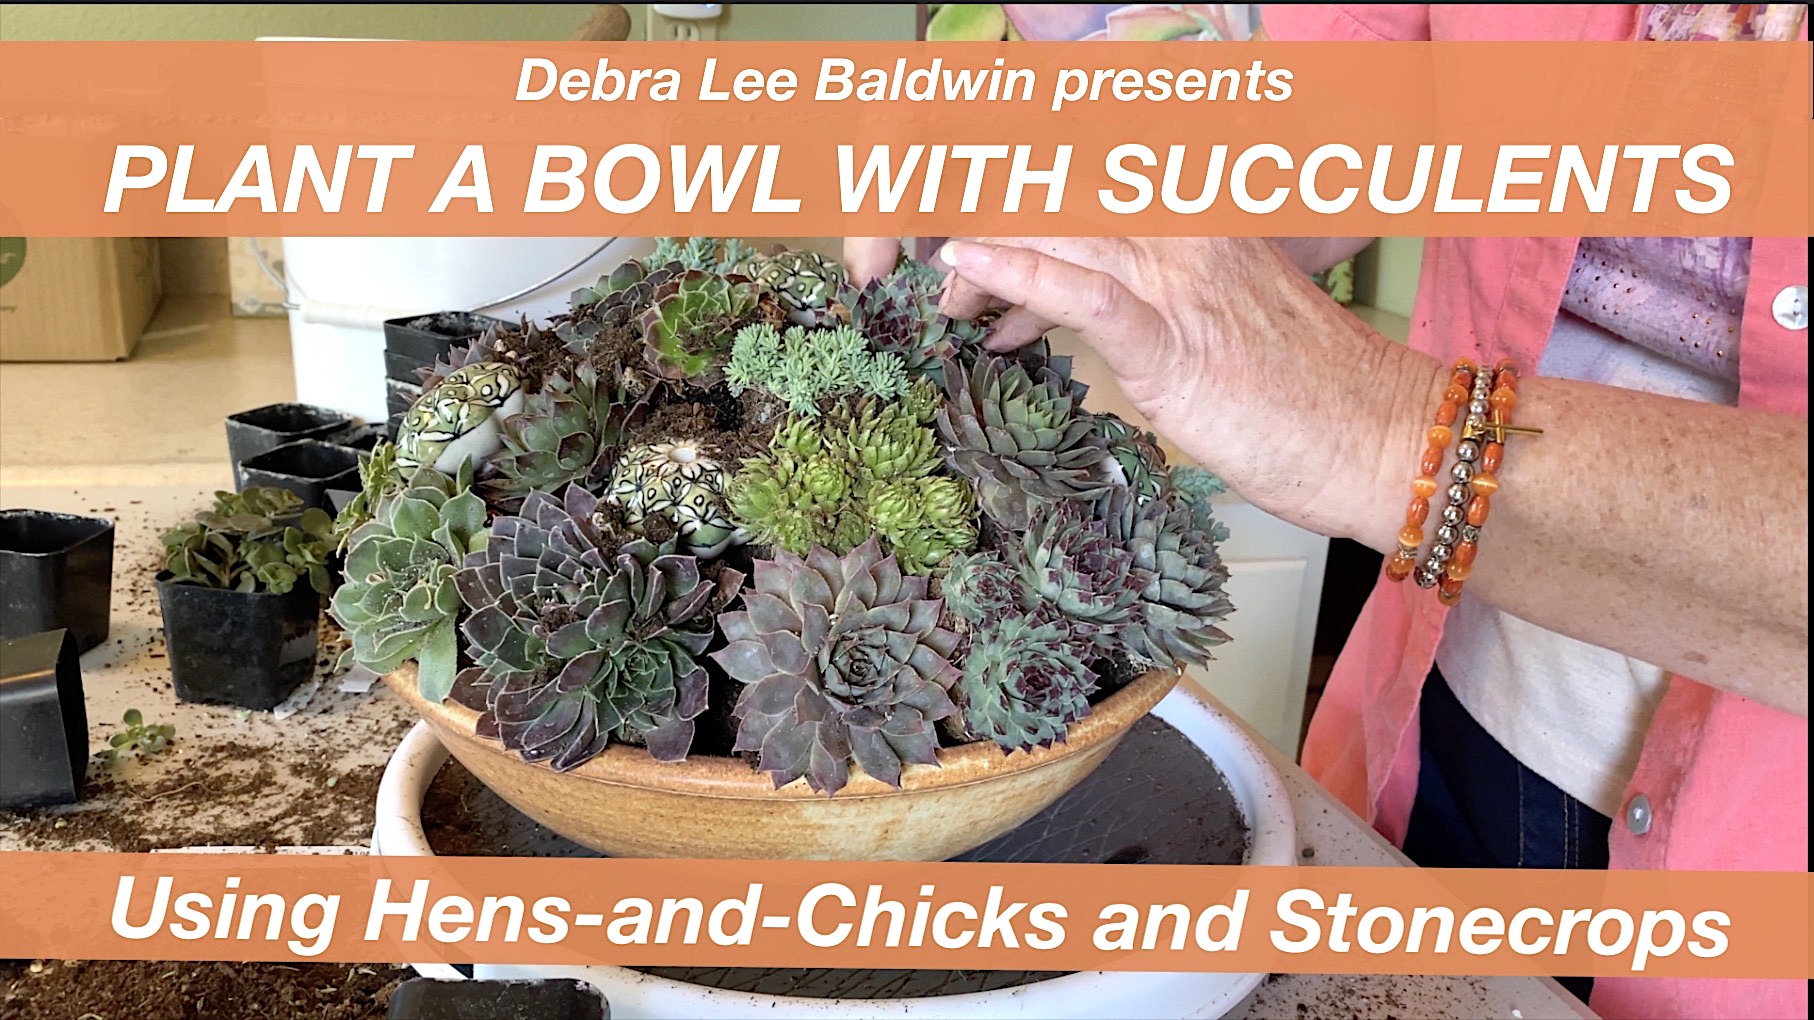
Make a Mounded Succulent Arrangement
Some of the best looking succulent arrangements are mounded, meaning plants are massed atop the container. Mounded arrangements look established right away and are quick and easy to make. The secret is to stack root balls on top of each other and angle the rosettes outward. They don't tumble out because they're recessed, and are supported by plants below them.
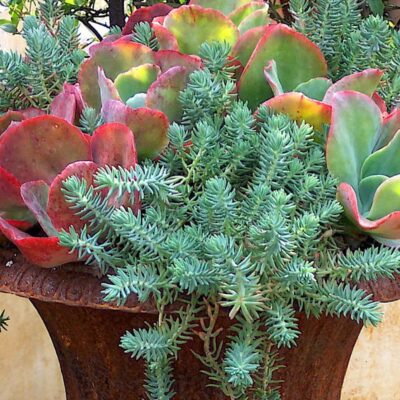
Sempervivum and sedum
How Many?
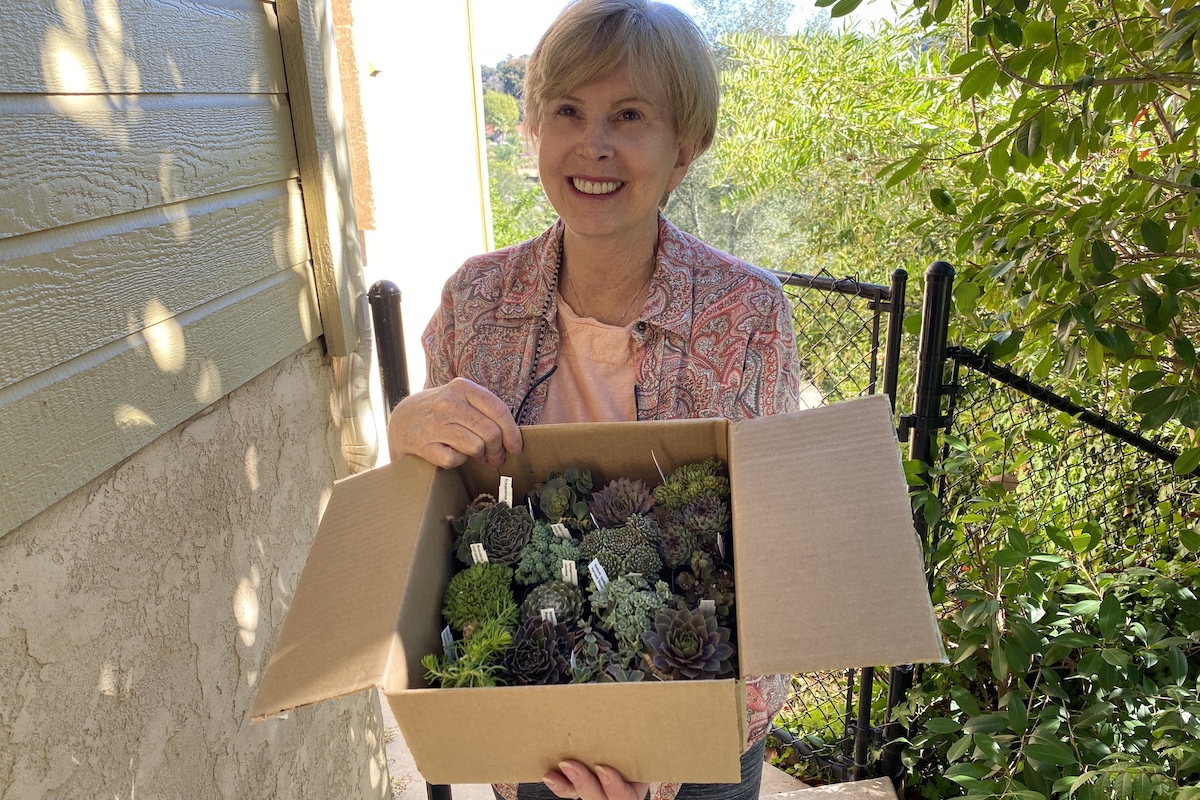
For a 12-inch-diameter container 3 inches deep, I used 22 sempervivums (hens-and-chicks) and six sedums (stonecrops) each in 2-inch pots. Find species and cultivar names below. All are from Mountain Crest Gardens and are cold-hardy to at least zero (some to -30F). Other rosette succulents, like echeverias, would work as well.
Learn more about cold-hardy succulents.
Step-by-Step DIY
I drilled a hole in this stoneware bowl so I could use it as a pot for succulents.
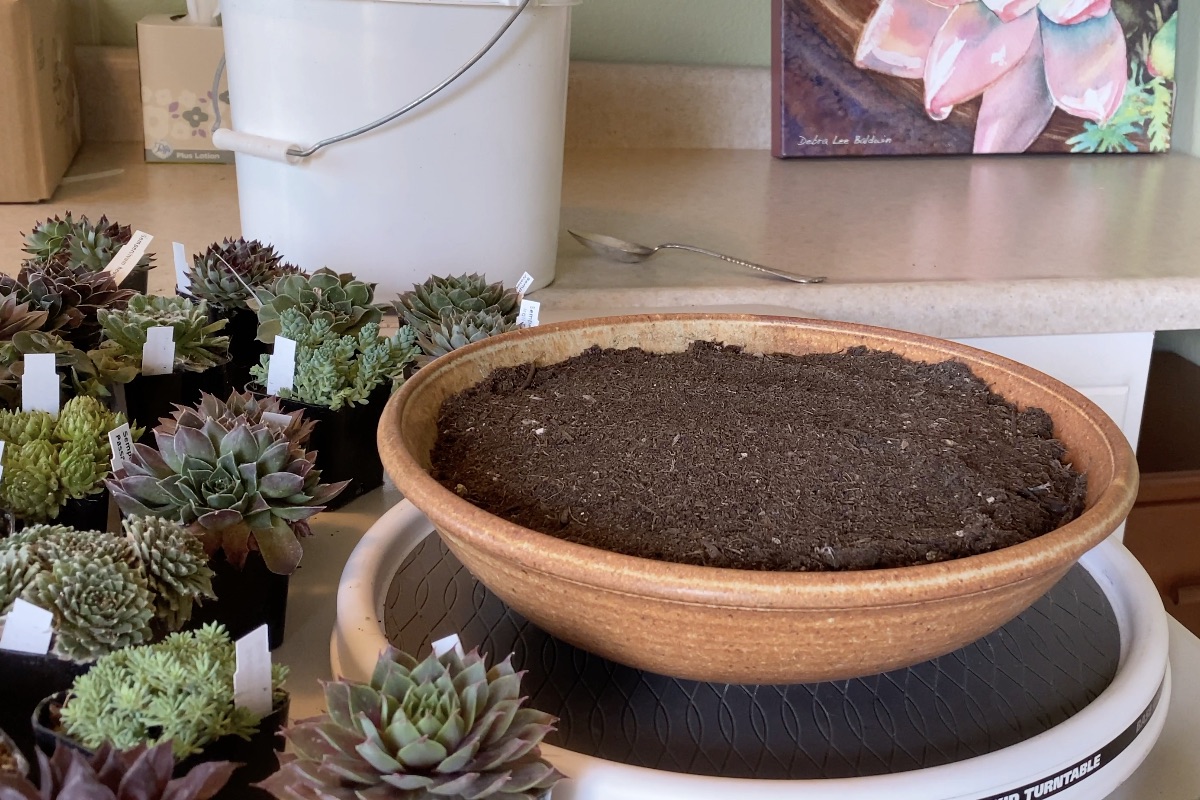
- (Above) Fill the container to about an inch below the rim with potting soil.
First layer
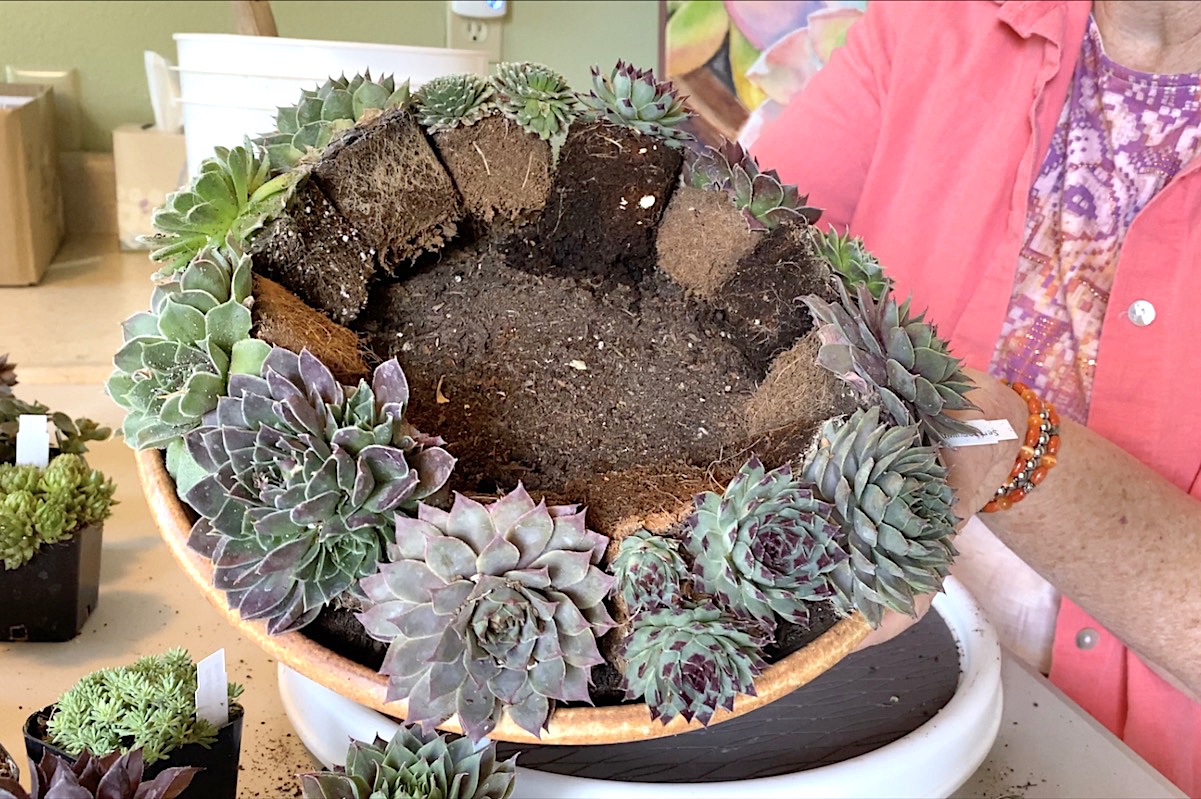
2. (Above) Slide plants out of their pots and lean them along the rim so their root balls are atop the soil, and the base of each rosette rests on the edge of the pot.
Note: You'll see in the video, I later replaced several bottom-row semps with sedums. They add texture and will trail over the edge.
3. (Below) Add soil to the open area, then add more plants to create a similar second layer. These should be recessed, angle upward at about 45 degrees, and their bottom leaves rest just behind the first layer.
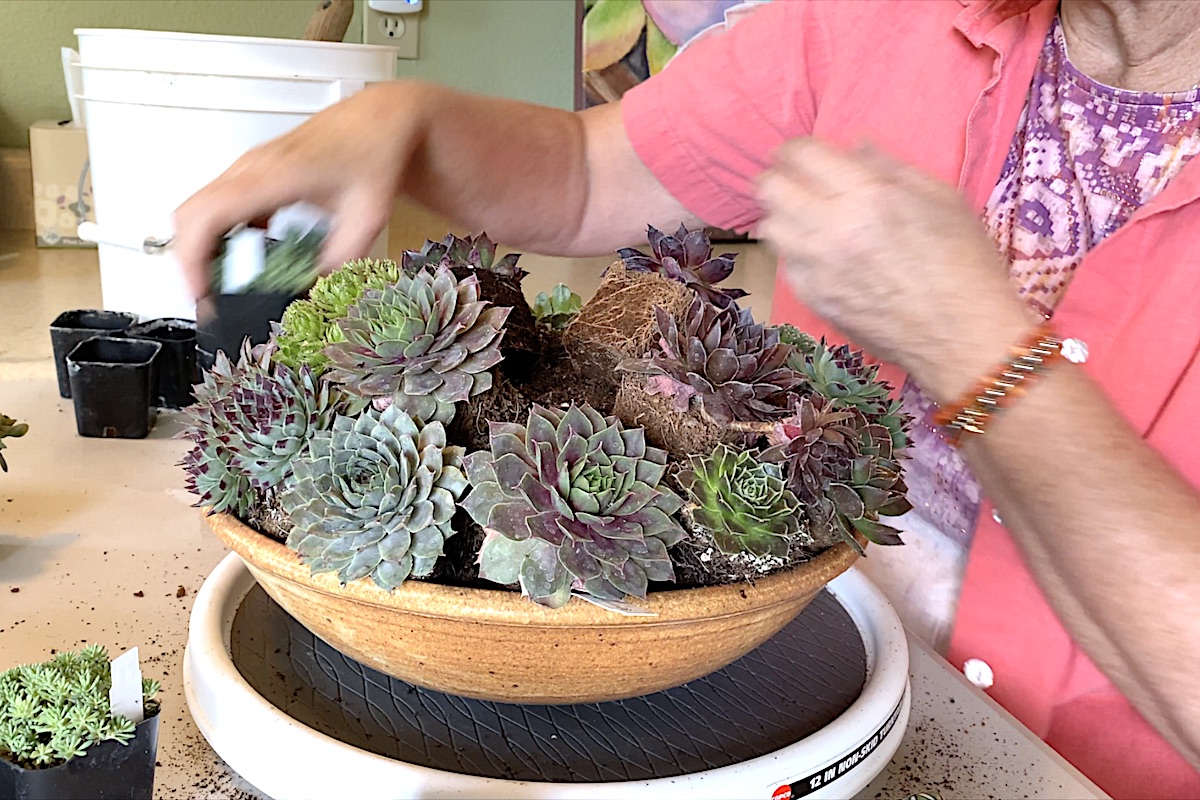
Second layer
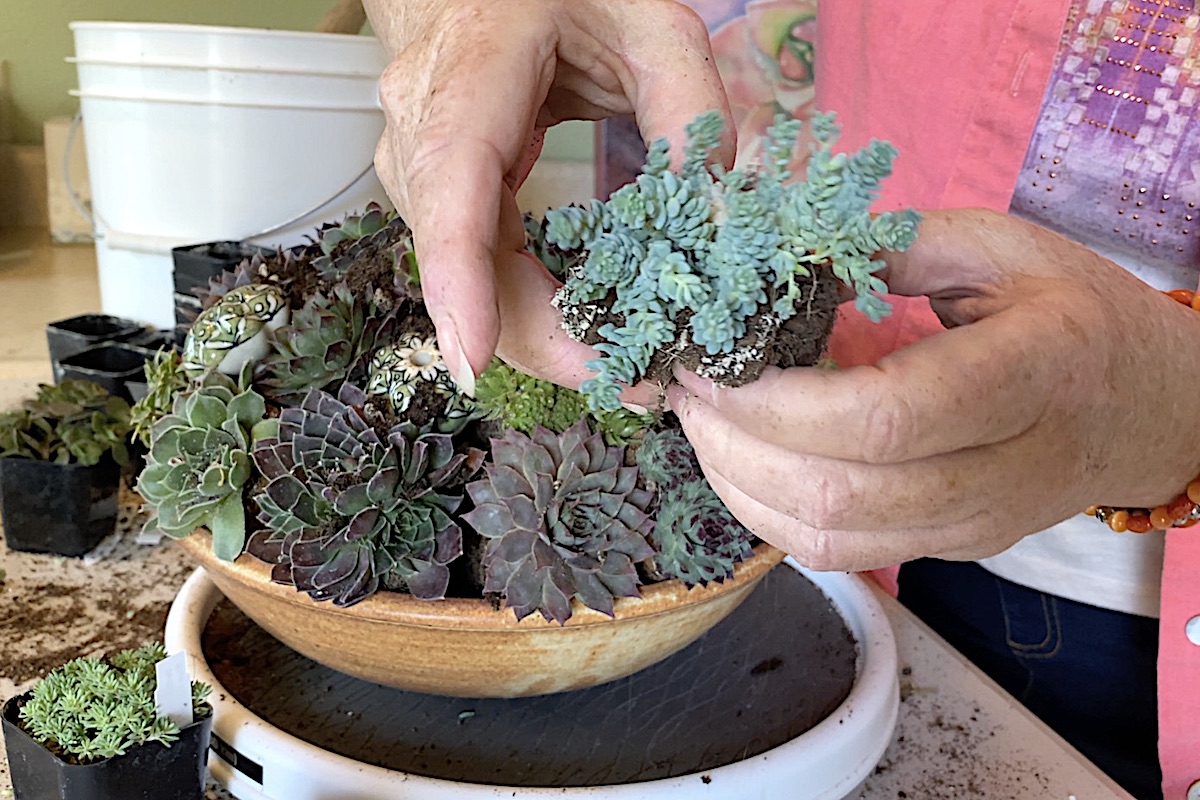
4. (Below) Add more plants to create a third (top) layer. Use soil to elevate them, if need be, so the overall shape of the arrangement is a dome. Tuck sedum into gaps. Hint: Gently pull sedums apart, root balls and all, to divide them. That makes them easier to tuck into small gaps.
Top layer
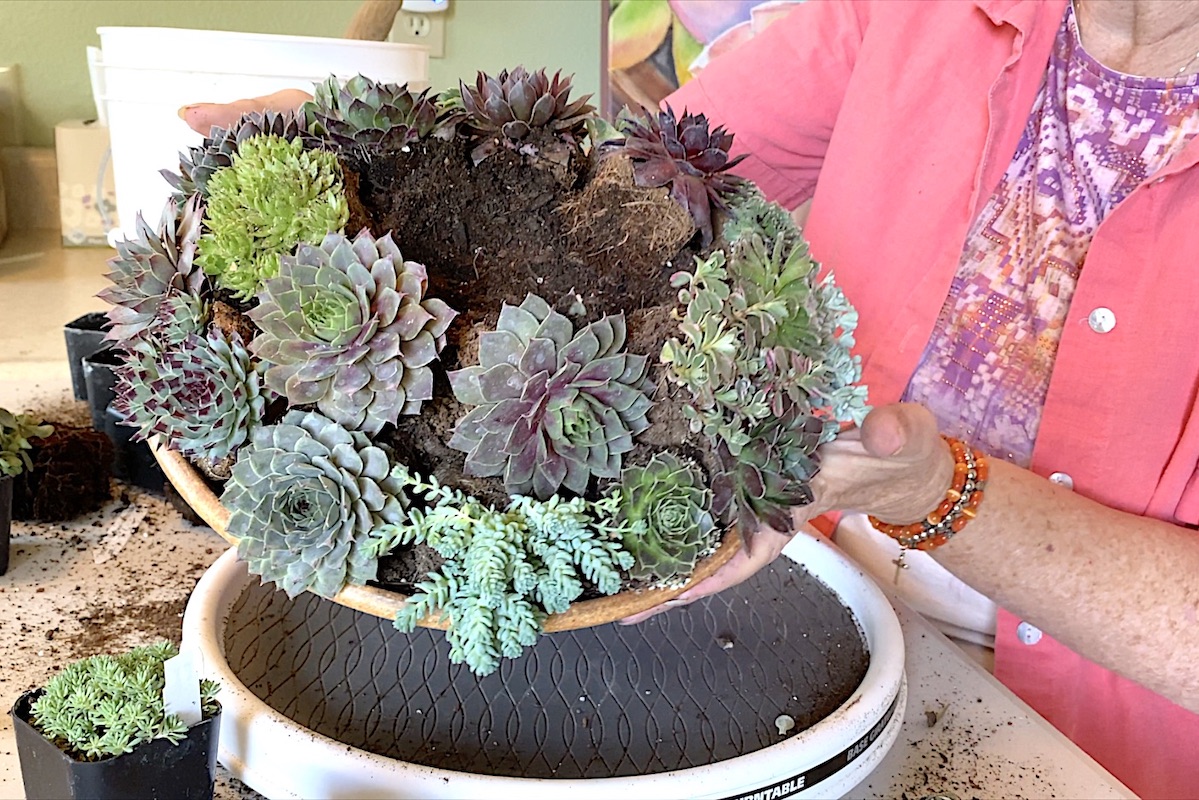
5. (Below) Fill remaining openings with soil. (I used a spoon.) To add interest, and just for fun, I also embellished the arrangement with ceramic drawer knobs that resemble semps.
Add soil to openings
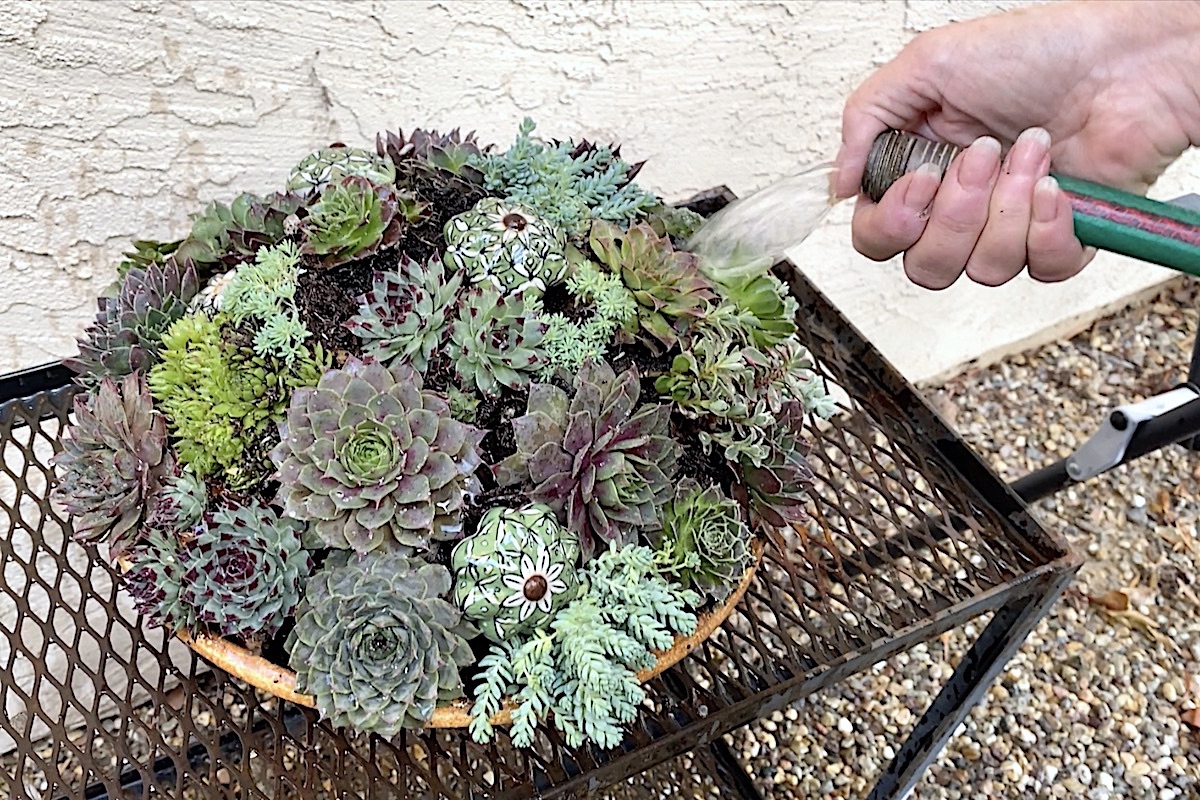
6. (Below) Hose off the arrangement to remove soil still clinging to the leaves and to help secure the root balls. When it was done dripping, I used my mounded succulent arrangement as a patio table centerpiece.
What these are (but just about any semps or fine-leaved sedums will work):
Figure 25-30 total: Sempervivum heuffelii (various), S. calcareum, S. 'Watermelon Rind', S. globiferum, S. arachnoideum, S. 'El Greco', S. 'Zulu', S. 'Chocolate Kiss', S. 'Strawberry Kiwi', S. 'Mint Marvel'; Sedum spathulifolium 'Harvest Moon', S. hispanicum 'Blue Carpet', S. spurium 'Tri-Color', S. dasyphyllum 'Himalayan Skies', S. tetractinum.
On my YouTube Channel ~
Related Info on this site

Designing with Cold-Climate Succulents
How to select, grow and design with cold climate succulents—sedums, sempervivums and more. Tips from Becky Sell of Sedum Chicks at the Northwest Flower and Garden Show
Succulent Container Design
Succulent Container Design Design ideas and must-dos for beautiful, easy-care potted succulents Here you’ll find info on succulent container design in articles and videos. Scroll down to see what interests you and best meets your needs. Click to see my gallery of 150+ floral-style arrangements! Succulent Container Gardens, How-To Welcome to the most comprehensive info…
Cold Hardy Succulents: Details, Photos and Varieties
Cold-Hardy Succulents: Details, Photos & Varieties Looking for succulents that go below freezing? You’re in the right place! About cold-hardy succulents The common cold-hardy succulents shown here can handle northern winters, snow, rainstorms (if given excellent drainage) and summer dry spells. Sedum (stonecrop) Trailing varieties are lovely as ground covers and in rock gardens, terraces and hanging…
You are so clever, and I think the knobs are a great touch.
Regards,
Alex
I’m so glad! Thanks for the thumb’s up, Alexandra!
Love the “mounded look”, but how do I achieve this look with succulent cuttings? I have so many succulents that there is no way that I want to buy more with root balls. If I can use my plethora of succulents that I already have, that would be great. Thanks!
Hi Marianne — Great question! Add moist potting soil into and above the bowl to create a firmly packed dome of soil. Using a pencil or chopstick, make holes in the soil and insert cuttings. That’s how many of the container gardens in this idea gallery were done.
How do you keep them from getting “leggy” as they grow?
Hens-and-chicks have a tight growth habit. The rosettes don’t have stems, but rather get larger in diameter, and send out “chicks.” The arrangement might need thinning, but not pruning.
I have started my own small succulent side business and I sell plants that I have propagated myself from my personal collection. I love making custom arrangements for people. A customer wanted an arrangement made entirely of hens and chicks. I found your tutorial and I don’t think I will ever make mounding arrangements the way I used to again! It turned out absolutely stunning! Thank you for sharing your expertise! I am off to buy all of your books now!
This makes me so happy, Natalie! Thank you!